Sophie's Pi

Mathematical baking

Sophie’s Pi is a record of my adventures in baking, maths and the real world, hoping to make my way to having my own patisserie empire some day. Or just getting to lick the bowl now and again.

  • Blog Search
  • Blog
  • About
  • Images
IMG_7240.JPG

59. Roast Plum French Toast

February 14, 2021 by Sophie Faulkner in Recipe

Well, here we are nearly half a year later. Things have massively changed in my life, and it’s been a pretty rough couple of months. But, I’m back on the blog, hopefully mostly due to this brunch I made myself. It was frankly too good not to share, and hopefully you’ll enjoy it too. It was easy to do, and the results were amazing. the balance of the roast plum and the decadence of the french toast and cream, balanced by the slight acidity of the lime zest will transform your brunch.

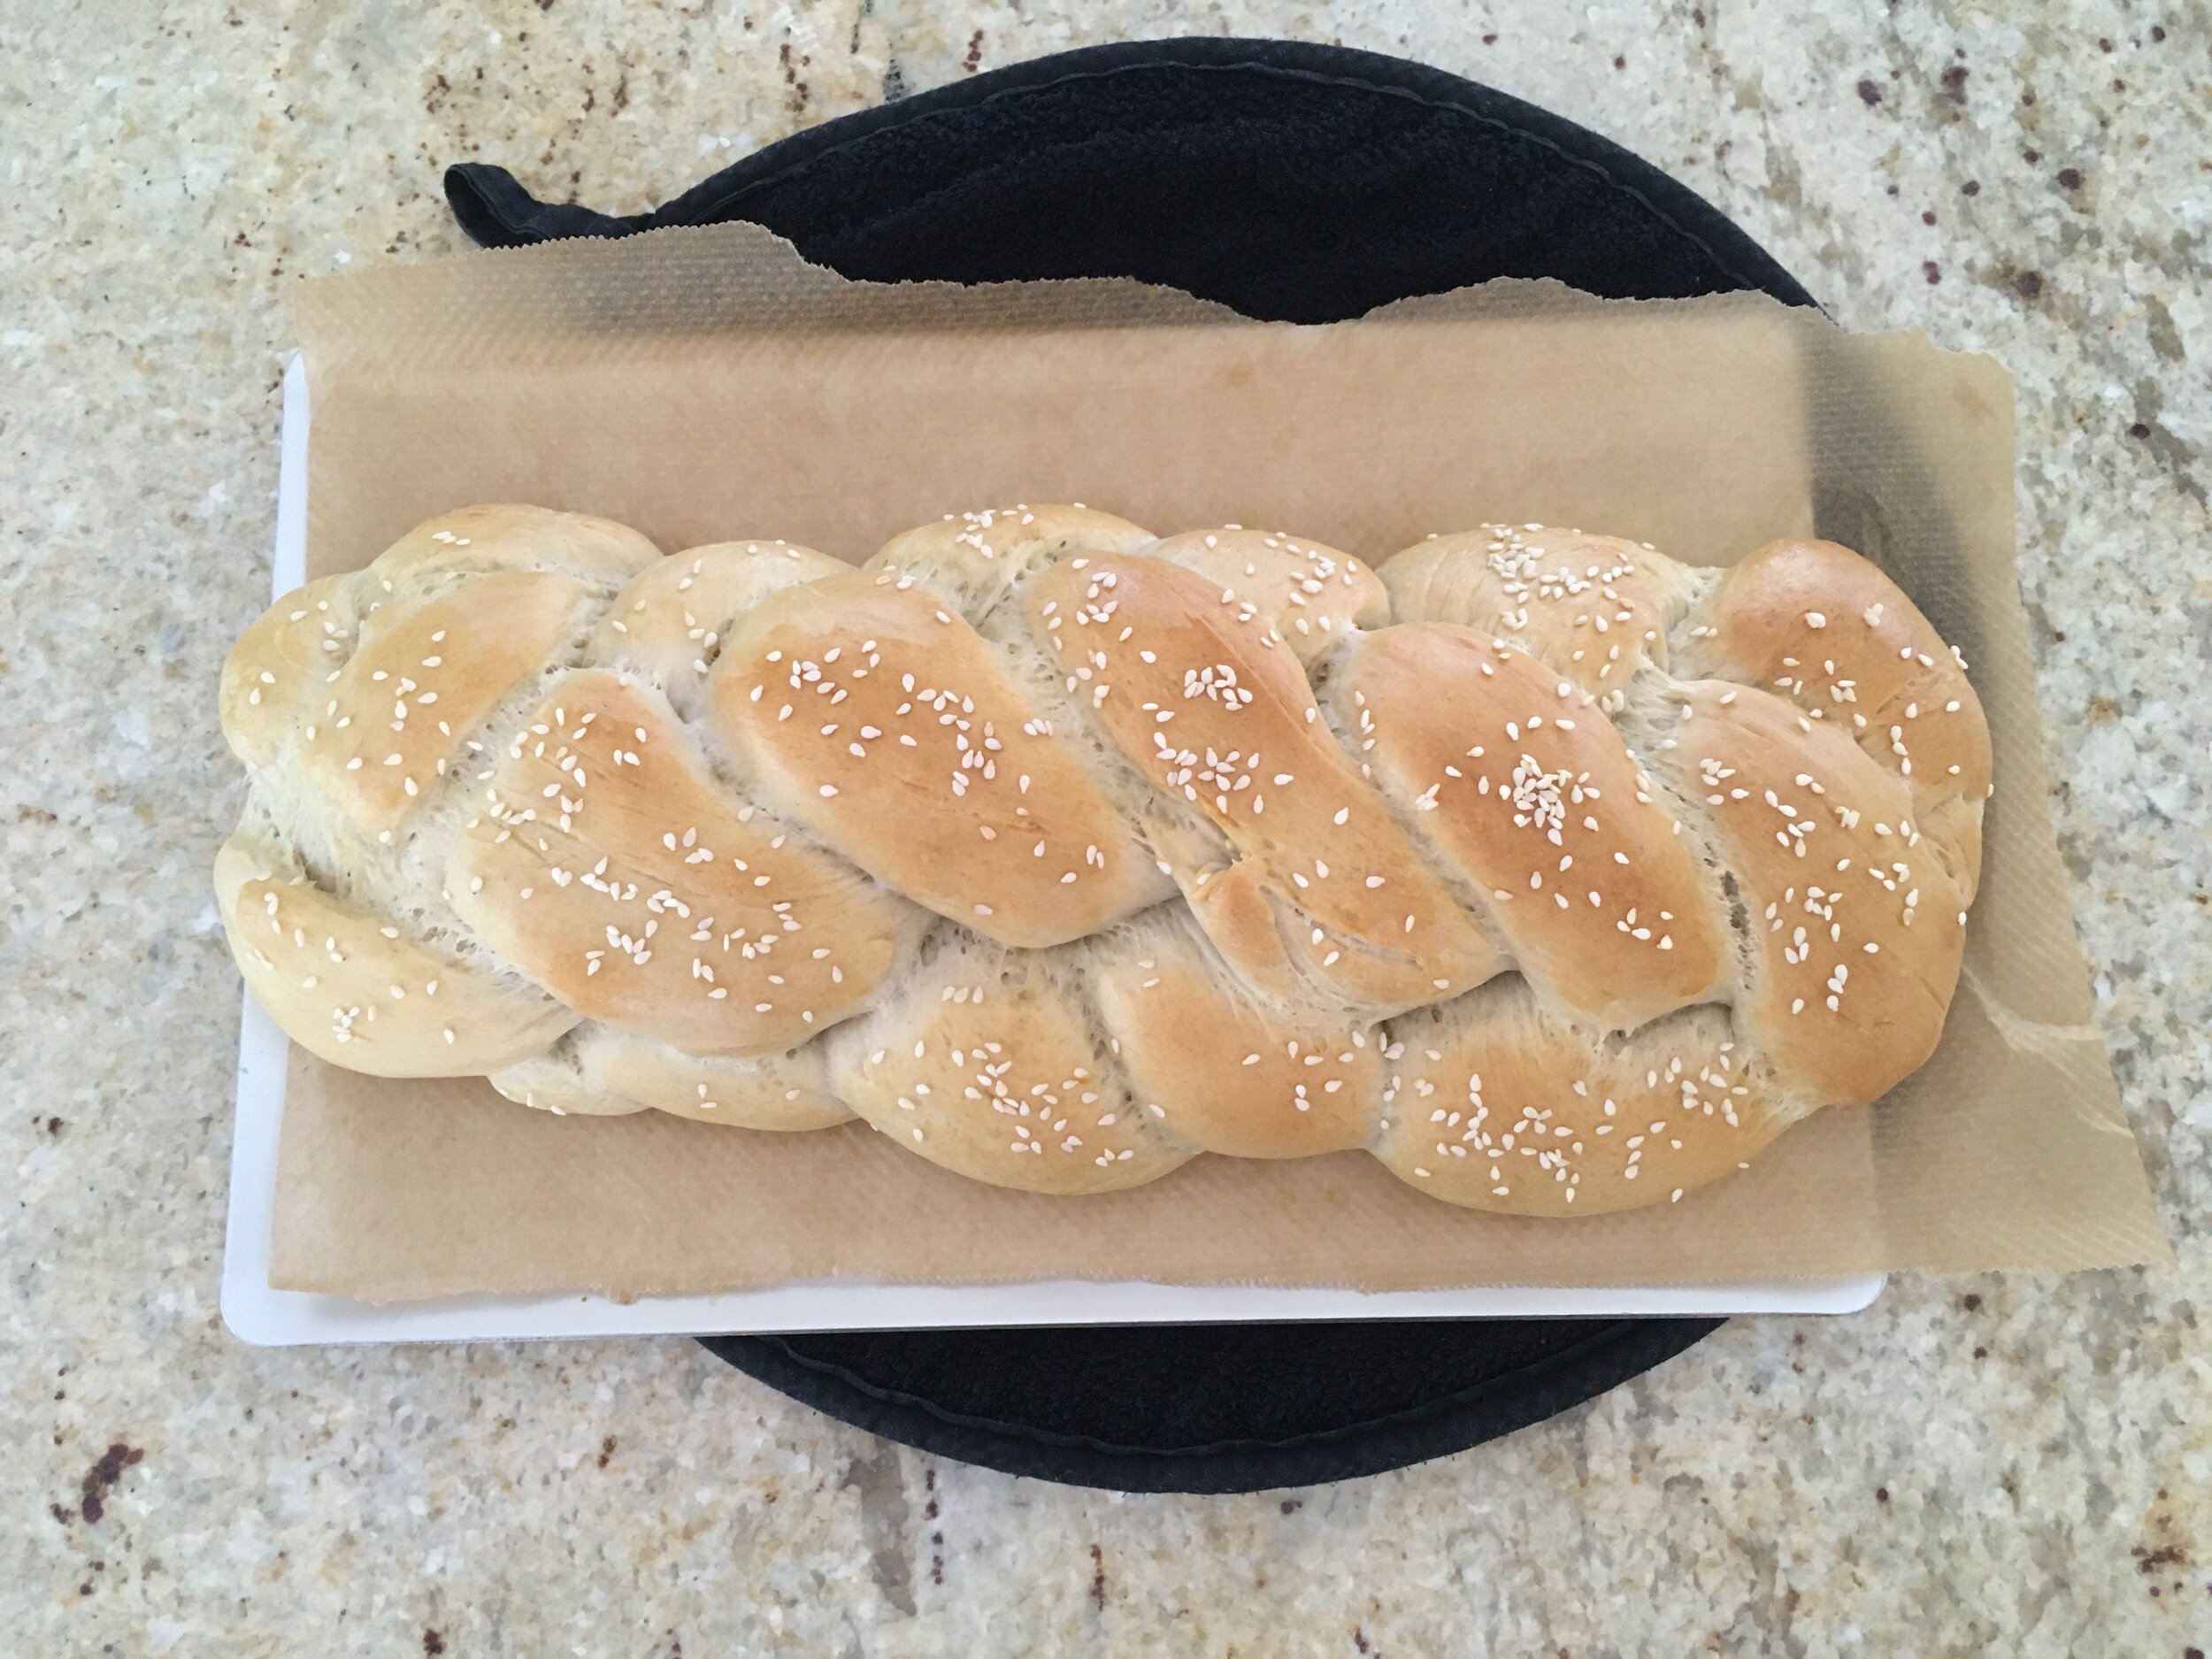
This recipe is for one, but you can double up or triple up the recipe very easily! The bread I used was some homemade Challah, using this recipe from Georgia’s Cakes, which you should definitely give a go, and I mentioned in a previous blog post here. It worked really well, but you could use any good bread!

Makes brunch for 1

Ingredients

  • 1 firm ripe plum

  • 2 tsp sugar

  • 1 knob of butter

  • 2 thick slices of bread

  • 1 egg

  • 2-3 tbsp milk

  • A splash of cream

  • Zest of 1/2 a lime

Method

  1. Halve and pit your plum and place each half in an unlined muffin tray, cut side up. Sprinkle over 1/2 a teaspoon of sugar over each half and leave to macerate for 15 minutes.

  2. Preheat the oven to 200C.

  3. Put a splash of water in each of the plum’s cupcake holes so that it comes about halfway up the plum. This will stop it burning and sticking to the cupcake tray.

  4. Roast for 25-30 minutes until soft.

  5. When the plums are almost done, start the French toast. Melt the knob of butter in a frying pan over a medium heat. While melting, in a shallow bowl, whisk together the egg, milk and remaining teaspoon of sugar. Dip the bread in this for a few seconds on each side so that it soaks up as much as possible without falling apart.

  6. Fry the bread for a couple of minutes on each side until golden.

  7. Plate the bread, with half a plum on each side, a splash of cream over the top and a sprinkling of lime zest.

IMG_7252.JPG
IMG_7255.JPG
IMG_7258.JPG
IMG_7259.JPG
IMG_7261.JPG
IMG_7262.JPG
February 14, 2021 /Sophie Faulkner
Recipe, bread, brunch, plum, fruit, sweet
Recipe
1 Comment
IMG_6466.JPG

58. Coconut Choc Chunk Cupcakes

July 11, 2020 by Sophie Faulkner in Recipe

These were made to fill a complete and utter craving I had for chocolatey goodness without just eating the whole bar in one go. They’re so quick and easy to make, I made them on my work from home lunch break! They went down pretty well and didn’t exactly last long!

Makes 12 cupcakes

Ingredients

  • (6oz) butter, room temperature

  • (6oz) golden caster sugar

  • (6oz) self-raising flour

  • 3 eggs

  • (2oz) desiccated coconut

  • (4oz) dark chocolate chunks

  • pinch of salt

  • 1/2 tsp vanilla extract

Method

  1. Preheat the oven to 180C and line a cupcake tray.

  2. Cream together the butter and sugar until light and fluffy.

  3. Add in the flour and then the eggs until well combined.

  4. Mix in the coconut, chocolate, pinch of salt and vanilla and mix until well distributed.

  5. Divide evenly into the cupcake cases (I found a heaped tablespoon was about right).

  6. Bake for 22-25 minutes until risen, golden and a skewer comes out clean.

  7. Leave to cool and enjoy!

View fullsize IMG_6458.JPG
View fullsize IMG_6462.JPG
July 11, 2020 /Sophie Faulkner
Recipe, cake, cupcake, coconut, Chocolate, sweet
Recipe
Comment
IMG_6343.JPG

57. Pizza

June 14, 2020 by Sophie Faulkner

Who doesn’t love pizza?

With the extra time of being at home with lockdown, and not having to commute, this has become a fairly staple midweek meal in our house. The dough needs an hour to rise and then it cooks in 10-15 minutes. It’s just so tasty and I can’t wait to have this again.

Makes 2 thin pizzas.

Ingredients

For the dough:

  • 250g plain flour or bread flour

  • 1/2 tsp salt

  • 1/2 a 7g dried yeast sachet

  • 1 tsp caster sugar

  • 1 tbsp olive oil

For the tomato sauce:

  • https://www.bbcgoodfood.com/recipes/pizza-sauce

  • 1 tbsp olive oil

  • 1/2 small onion, finely diced

  • 1 garlic clove

  • 400g can chopped tomatoes

  • 1 1/2 tbsp tomato puree

  • 1 bay leaf

  • 1 tbsp dried oregano

  • 1 tsp sugar

  • some fresh basil

For the toppings:

  • Dealer’s choice!

Method

  1. First make the pizza dough. Sieve the flour and salt into a mixing bowl, or an electric mixer with a dough hook. Make a well in the middle.

  2. Add the yeast, sugar and oil to a jug of lukewarm 160ml water, and mix to hydrate the yeast. Pour this into the well and mix until fully incorporated as a dough. Knead either by hand on a lightly floured surface or with the electric mixer with a dough hook attachment until smooth and elastic. If using an electric mixer, this should take around 7-8 minutes, or about 10-12 minutes by hand.

  3. Place the ball of dough into a lightly oiled bowl and cover with a clean tea towel. Leave to rise for an hour until doubled in size.

  4. In the meantime make the pizza sauce, using this BBC Good Food Recipe. I halved the quantities so there wasn’t too much.

  5. Once the dough has risen, preheat the oven to 220C and lightly flour two baking trays

  6. Lightly dust a surface with flour and roll out half the dough into a thin circle that is about as large as your tray will allow. Transfer to the tray and top with pizza sauce and toppings of your choice. (I had goats cheese, anchovies and capers.) Repeat with the other half of the dough.

  7. Bake in the oven for 10-15 minutes depending on how thin you have managed to roll your dough. Allow to cool for 2 minutes before slicing and serving or risk burning your mouth like somebody did here…

View fullsize IMG_6333.JPG
View fullsize IMG_6334.JPG
View fullsize IMG_6336.JPG
View fullsize IMG_6344.JPG
IMG_6346.JPG
June 14, 2020 /Sophie Faulkner

56. Choux Pastry Swans

May 24, 2020 by Sophie Faulkner in Recipe

Well. Lockdown’s been a funny old time.

I’ve just spent the last two months at my Dad’s house and got back to London this weekend. It’s nice to be home and back in my own kitchen. Part of the issue of me not uploading over the last month has been I didn’t want to test recipes too much at my Dad’s, a) because I didn’t want to waste ingredients and b) because they have an AGA not a normal oven. In the last month I have had some real baking disasters, including undercooked croissants and burnt bread.

But I’m back now, so provided I can get my hands on ingredients, the baking is back on.

choux swan.jpg

My rugby club are doing a sweet challenge, where we each have to make a sweet dish that is linked to a happy memory for us. Mine was always going to be choux pastry swans. I first made these for a family dinner party my parents were having when I was about 10? Possibly? I’m not entirely sure. However, my portion control was completely wrong and the book I was baking from didn’t have reference pictures. So When I presented my family with one of these on a full sized dinner plate each after dinner, there was a bit of laughter. It always makes me smile remembering the blunder, but I was just so happy I had made them!

I have now made them a much more reasonable size, and while I would normally use chantilly cream to fill them, I had to use lemon buttercream as I am not about to go out in this to buy just cream!

Makes 9-12 swans

Ingredients

For the choux pastry

  • 62ml milk

  • 62ml water

  • 1/2 tsp sugar

  • 1/4 tsp salt

  • 62g (2.2oz) butter

  • 125g (4.4oz) flour

  • 2-3 large eggs, lightly beaten

For the buttercream

  • 150g butter, room temperature

  • 225g icing sugar

  • pinch of salt

  • zest of 1 lemon

Method

  1. Place the milk, water and butter in a pan and place on a gentle heat, stirring until the butter has all melted. Once melted bring to a rapid boil over a high heat and remove from the heat immediately.

  2. Pour in the flour and beat with a spatula until well combined and then return to the heat. Beat the mixture on the heat for about 10-15 seconds until the mixture all comes away from the side of the pan and forms one ball. This is to dry out the dough.

  3. Place the dough in a bowl to stop it from cooking any further and spread up the sides of the bowl to cool.

  4. Add in the eggs a bit at a time, beating with the spatula until fully incorporated. This should take at least 3 separate additions. If you add it all at once your pastry will not be able to handle all the gg and won’t combine smoothly.

  5. Keep adding egg until your pastry is smooth and glossy. If you draw a line through it with your spatula, your pastry should slowly start to fill in the gap.

  6. Preheat the oven and line 1 or 2 baking trays.

  7. Fill a piping bag with your pastry and a medium circular nozzle. Pipe 9-12 profiteroles by holding the bag almost vertically about 1.5 cm from the tray and let the dough come out and form a mound, there is no need to move your piping bag. Your mounds should be about 4-5cm in diameter. Leave space between as they will puff up.

  8. Replace the medium circular nozzle with a smaller one (in a new piping bag, or by using the piping nozzle attachment if you have one) and pipe 9-12 swan necks. Similarly to the profiteroles, let a small mound form for the head and then draw and S shape for the neck. The smaller the nozzle you use the better for these. You may wish to do these on a separate tray if there is a large size difference between your nozzles, as thin necks will bake much faster.

  9. Dab the tops of each profiterole and neck with some cold water and then brush over any leftover egg for a nice shine.

  10. Bake the profiteroles and necks for 20-25 minutes until golden and sounding hollow when tapped. Take out and leave to cool

  11. Make the buttercream by beating the butter until light and fluffy and then incorporating the sugar, salt and lemon zest. Fill a piping bag with a star shaped nozzle and your buttercream.

  12. Cut the top off each profiterole and slice the removed top in half to form wings. Fill the base with buttercream and place a neck and the wings in. Top with further buttercream if not structurally sound.

  13. Serve as they are, or ‘swimming’ on some melted chocolate.

View fullsize IMG_6175.JPG
View fullsize IMG_6182.JPG
View fullsize IMG_6187.JPG
View fullsize IMG_6193.JPG
View fullsize IMG_6199.JPG
View fullsize IMG_6202.JPG
IMG_6219.JPG
May 24, 2020 /Sophie Faulkner
sweet, Recipe, choux pastry, swan, dessert
Recipe
1 Comment

55. Meringues and various other (not my) recipes from the past two weeks

April 05, 2020 by Sophie Faulkner in Recipe

Well, its been a weird old couple of weeks. I hope you are all well and staying in and staying safe as much as you can. I have relocated from my tiny London flat to my Dad’s house in the countryside for, well, the foreseeable future. This means that I am without my usual baking rammel and oven. There’s just an AGA here, which is fine, but needs some getting used to!

As this upheaval has been happening, I haven’t been experimenting and doing my usual recipe testing for the blog, at least partially due to lack of time and partially due to lack of easy supply of ingredients, such as flour. So over the past 2 weeks I have made: custard tarts, meringues and challah bread, only one of which was my own recipe, and only one of which I got pictures of.

Below you will find my recipe for meringues and links for the recipes for custard tarts and challah bread, with a couple of additional notes on how I slightly altered the recipes.

Custard Tarts

In this recipe I substituted the pastry for the vanilla shortcrust pastry I made for the Polka Dot Chocolate Tart, in the same quantity as that recipe. It made 9 custard tarts and they were very very tasty, but no pictures. Oops. I also HALVED the amounts for the custard recipe as I was making individual custard tarts, rather than one large one, so needed less.

https://www.bbcgoodfood.com/recipes/custard-tart

Meringues

Another no pictures I’m afraid, but these were made to use up the egg whites left over from the custard tarts recipe.

Ingredients

  • 4 egg whites

  • 115g (4oz) caster sugar

  • 115g (4oz) icing sugar

Method

  1. Whisk the egg whites up to medium peaks and then, while still beating on a low speed, add in the sugar a tablespoon at a time, giving at least a couple of seconds between tablespoons. Continue beating once the sugar is all added if you have not yet achieved stiff peaks.

  2. Sift the icing sugar onto the egg whites and gently fold in so as not to knock out any air.

  3. Preheat an oven to 100C and prepare two baking trays with non-stick paper and a piping bag with a star nozzle.

  4. Fill the piping bag with the meringue mixture and pipe meringue nests onto your baking trays.

  5. Bake for 1h15mins - 1h30 mins until firm and easy to pick up off the baking sheet.

Challah Bread

This bread was a recipe from one of my favourite Youtubers/Instagrammers Georgia’s Cakes, a Le Cordon Bleu alumni. She is currently doing a back to basics series of recipes and this challah bread was ery easy and very yummy.

The recipe video can be found here: https://www.youtube.com/watch?v=uPS-M32Zrts

I altered the braiding pattern used though, as I wanted to be able to use the bread for sandwiches if possible, so I did a 4 strand braid, for which you can find photos and instructions below.

4 strand braid

  1. Lay out your 4 strands in front of you, well spaced and press the tops of all of them together.

  2. Take the far left hand strand and place it over the two middle strands.

  3. Take the far right hand strand and place it over the new two middle strands

  4. Take the strand that is now middle right and place it over the middle left strand. Respace the strands as necessary.

  5. Repeat steps 2-4 until completely braided, then press any loose ends together.

  6. Tuck the ends underneath the braid and transfer to a lined baking tray.

  7. Bake exactly as in Georgia’s recipe.

View fullsize IMG_5728.JPG
View fullsize IMG_5729.JPG
View fullsize IMG_5730.JPG
View fullsize IMG_5731.JPG
IMG_5738.JPG
April 05, 2020 /Sophie Faulkner
challah, bread, meringue, custard, tarts, Recipe
Recipe
Comment
IMG_5621.JPG

54. Polka Dot Chocolate Tart

March 22, 2020 by Sophie Faulkner

What weird times we’re living in… I am trying my best not to go stir crazy sat at home, so I thought I would try and challenge myself to make an entry to the Le Cordon Bleu Pastry Win competition on Instagram. While the rest of the entires are entirely out of my league, I thought it would be fun to challenge myself anyway.

This was inspired by a Instagram post I saw of a strawberry tart with polka dot pink pastry. It looked incredible and fun, so I saw no reason not to give it a go! I tried to do the polka dots before lining my pastry tin, which I think may have been a mistake, on the bottom half, but the decorative disc worked really well I think, so not a complete fail!

Let me know if you have a go, or if you have been doing any self-isolating baking too.

Makes 1 tart

Ingredients

For the vanilla pastry

  • 110g (3.9oz) butter, room temperature

  • 50g (20z) caster sugar

  • 1 egg

  • 1 tsp vanilla extract

  • 1 pinch of salt

  • 180g (6oz) plain flour

For the chocolate pastry

  • 110g (3.9oz) butter, room temperature

  • 50g (2oz) caster sugar

  • 1 egg

  • 1 tsp milk/water

  • 1 pinch of salt

  • 150g (5.25oz) plain flour

  • 30g (1oz) cocoa powder

For the ganache

  • 225ml double cream

  • 38g (1.35oz) butter

  • 150g chocolate (preferably dark)

  • 1 tsp sugar

  • Pinch of salt

For the vanilla buttercream

  • 100g (3.5oz) butter, room temperature

  • 150g (5.25oz) icing sugar

  • 1 tsp vanilla extract

  • 1-2 tsp milk

  • pinch of salt

Method

  1. Start with the vanilla pastry. In a bowl, cream together the sugar and butter together until fluffy and light. Add in the vanilla extract and the eggs and beat until smooth.

  2. Fold in the flour and salt until a dough forms.

  3. Chill your dough in the fridge, wrapped in clingfilm for at least 15 minutes to make it easier to work with.

  4. For the chocolate pastry, repeat steps 1-3 swapping the vanilla extract for milk/water and adding the cocoa powder with the flour.

  5. Lightly grease your tart tin/ring (and line your tray if using a ring). Line and additional tray for your decorative disc.

  6. Roll out your two pastry doughs to about 1/6” thickness. Choose which dough you would like to make the tart and which to decorate. Use your tart ring to cut out a circle of your DECORATIVE dough. Then line your tart ring using your TART dough, leaving the excess on for now.

  7. Use small cookie cutters to exchange pieces between your two doughs. When exchanging, use your fingers to tap the new dough and surrounding dough into place. Dip your fingers in water to help this stick together. Keep doing this until you are happy with the design and then fridge for at least ten minutes.

  8. Preheat the oven to 175C.

  9. Roll the excess off your tart using your rolling pin, then push the dough into the sides to make sure it is all lined evenly. Use the back of a knife to get rid of any excess.

  10. Cut out the centre of your decorative ring and place on the same tray, if you have room.

  11. Pierce the base of your tart several times using a fork, all the way through! This will stop the bottom from rising as it bakes. Line the tart with either greaseproof paper or clingfilm and fill with baking beans, rice or something else suitable to hold up the edges of the tart as it bakes.

  12. Blind bake the tart with the beans in and the decorative pastry for 15 minutes until the edge is golden.

  13. At this point remove the baking beans from the tart for another 15-20 minutes until the base is golden as well. Take out the decorative ring if golden and firm, or allow to bake for a further five minutes.

  14. Take out of the oven and allow to cool before removing from the tin.

  15. For the ganache: In a pan bring the cream, sugar and salt to the boil and immediately remove from the heat. Add in the butter and then chocolate in chunks and stir until they have completely blended in.

  16. Pour the chocolate ganache into the tart once the tart has cooled and leave to set at room temperature. If you put it in the fridge it may seize.

  17. For the buttercream: Cream the butter for the icing until light and fluffy. Add in the icing sugar, beating until light and fluffy, then add in the vanilla extract and milk (as much as needed). Keep beating if not light and easily spreadable.

  18. Once the ganache has set, pipe some buttercream in a design such that the decorative ring can rest on it at a bit of height above the tart surface. This could be pleats like I did, or small mounds in a circle.

  19. Decorate with ring and disc and impress your mates!

IMG_5609.JPG
IMG_5612.JPG
IMG_5616.JPG
IMG_5619.JPG
March 22, 2020 /Sophie Faulkner
IMG_5411.JPG

53. Flapjack

March 14, 2020 by Sophie Faulkner in Recipe

Sorry for skipping a week! Work have banished me to Southampton for the past two weeks, and I’ll be having my third week there this week. It’s hard to bake when you’re stuck in a hotel… It’s also hard to upload when you’re on a family weekend in the Lake District. It was so lovely seeing everyone and going for walks, we even got to play in some snow at the tops of the hills.

In aid of the hill walking energy provisions, I decided to make some flapjack, a classic, easy and full of energy snack. I drizzled mine with a little melted chocolate, but they’re still tasty just as they come! You can easily scale this 4 ingredient recipe to make however many you want, the ratios are just 1:1:1:2 of butter : golden syrup : sugar : porridge oats.

Makes 20

Ingredients

  • 225g (8oz) butter

  • 225g (8oz) golden syrup

  • 225g (8oz) light brown sugar

  • 450g (16oz) porridge oats

  • 1 tsp cinnamon

Method

  1. Preheat the oven to 150C. Line and grease a baking tin (at least 3cm deep). If you don’t have a suitable baking tray, or it’s too big, like mine, line it with baking paper and fill the part you don’t want to use with baking beans/rice/pennies. This will make your tin smaller, so you can still get good thick flapjacks. (See picture)

  2. Melt the butter in a large pan over a medium heat.

  3. Add the golden syrup and sugar and keep heating until the sugar has fully dissolved, mixing once in a while.

  4. Remove from the heat and add the porridge oats and the cinnamon. Mix together until evenly combined.

  5. Fill your baking tin with the mix and press down to make it nice and compact, or else it may fall apart.

  6. Bake for 35-40 minutes, until golden and the edges are firm.

  7. Allow to cool in the tin, and then turn out and chop into squares.

  8. If you want to fancy them up, you could drizzle on some melted chocolate, or a small amount of icing, or just eat as they are.

View fullsize IMG_5400.JPG
View fullsize IMG_5404.JPG
View fullsize IMG_5405.JPG
View fullsize IMG_5409.JPG
March 14, 2020 /Sophie Faulkner
Recipe, flapjack, sweet
Recipe
1 Comment
IMG_5387.JPG

52. Caramel Apple Tart

March 01, 2020 by Sophie Faulkner in Recipe

So my friend Catherine came to visit this weekend to see Waitress starring Sara Bareilles, the writer of the show! It was amazing and wonderful and everything you could possibly want out of a musical about BAKING. So a weekend with a musical about my favourite thing with my favourite people, what else could possibly make this weekend better? MORE BAKING!!!

As Catherine has given up chocolate for lent, that was off the table, so caramel apple tart it was and oh boy was it GOOD.

Makes 1 tart

Ingredients

For the pastry

  • 110g (4oz) butter, room temperature

  • 50g (20z) caster sugar

  • 1 egg

  • 1 tsp vanilla extract

  • 1 pinch of salt

  • 180g (6oz) plain flour

For the caramel

  • 75g (3oz) butter

  • 75g (3oz) light brown sugar

  • 1 397g can of condensed milk

For the apple filling

  • 3 medium sized apples (Braeburns work really well)

  • 50g (2oz) caster sugar

  • 2 tbsp plain flour

  • Some extra brown sugar for sprinkling

Method

  1. Beat the pastry sugar and butter together until creamy. Add in the vanilla extract and the eggs and beat until smooth.

  2. Fold in the flour and salt until a dough forms.

  3. Chill your dough in the fridge, wrapped in clingfilm for at least 15 minutes to make it easier to work with.

  4. In a small pan melt the caramel butter and sugar on a low heat until the sugar is fully dissolved.

  5. Add in the tin of condensed milk and bring up to a rapid boil, stirring all the time, until it is a lovely caramel colour. Boil for at least a minute.

  6. Peel and core your apples. Then slice them into very thin slices, as thin as possible. Place them in a bowl with the apple filling sugar and flour and toss.

  7. Preheat the oven to 175C and lightly grease your pie/tart tin. Mine is 23cm diameter.

  8. On a lightly floured surface roll out your dough into a rough circle about 1/6” thick. Use this to line your tart tin. Trim the excess dough off, and press the dough into the sides, making sure it is fully pressed into the tin. Trim again if necessary.

  9. Spread the caramel sauce over the bottom of the tart, you may not need all of it.

  10. Layer up the apple pieces in any design you like, then add on some extra bits of leftover pastry in any decorative way you like, I just made some balls. Sprinkle over the extra sugar.

  11. Bake for 40-45 minutes until golden. Allow to cool for 5-10 minutes before serving warm, or allow to cool completely and store in an airtight container.

IMG_5341.JPG
IMG_5344.JPG
IMG_5348.JPG
IMG_5351.JPG
IMG_5380.JPG
IMG_5361.JPG
March 01, 2020 /Sophie Faulkner
caramel, Tart, pastry, apple, Recipe
Recipe
Comment

51. Caramel Choc Chip Cookies

February 22, 2020 by Sophie Faulkner in Recipe

I just wanted to experiment with caramel today after seeing a recipe for caramel blondies in ‘The Violet Bakery Cookbook’ by Claire Ptak, so I made some caramel chocolate chip cookies. Not too hard to do at all, and a little step up from your normal chocolate chip!

Makes 15 - 20 cookies

Ingredients

For caramel shards

  • 80g caster sugar

  • 2 tbsp water

For the cookies

  • 225g flour

  • Pinch of salt

  • 3tsp baking powder

  • 100g butter, cold and diced

  • 120g light brown sugar

  • 100g chocolate chips

  • 2 eggs, beaten

Method

  1. Start with the caramel, as you need to let this cool before you break it into shards to put in your cookies. Put the water in a pan and cover with the sugar. Heat on a low to medium heat until the sugar has dissolved. DO NOT STIR as this may cause the sugar to crystallise.

  2. Once the sugar has fully dissolved, turn it up to a high heat and bubble away until it is a deep amber colour (around 170C for those with thermometers who want to be precise). If your sugar crystallises, turn the heat back down to low to medium and add some more water to dissolve the crystals again.

  3. Pour your caramel onto a piece of baking paper (or silicone mat as I did) on a heat proof surface or baking tray. Allow to cool at room temperature.

  4. Preheat the oven to 180C, and line two baking trays.

  5. In a large bowl, mix together the flour, salt and baking powder, and then rub in the butter until it is the consistency of bread crumbs, then mix in the sugar and chocolate chips.

  6. Once the caramel has cooled, use the back of a knife to whack it and create shards. Use your fingers to snap into smaller pieces if necessary, but be careful, as caramel can be quite sharp.

  7. Mix the caramel shards into the cookie mixture, then add the eggs and mix until a sticky dough forms.

  8. Split the dough into little balls (or just hunks, I wasn’t bothered about pretty today) and place on the baking trays spaced apart.

  9. Bake for 10-12 minutes until starting to turn golden.

  10. Allow to cool and enjoy!

View fullsize IMG_5280.JPG
View fullsize IMG_5285.JPG
View fullsize IMG_5288.JPG
View fullsize IMG_5283.JPG
View fullsize IMG_5292.JPG
View fullsize IMG_5293.JPG
View fullsize IMG_5297.JPG
View fullsize IMG_5300.JPG
View fullsize IMG_5298.JPG
View fullsize IMG_5301.JPG
February 22, 2020 /Sophie Faulkner
Cookies, Chocolate, caramel, Recipe
Recipe
Comment
Tiffin.jpg

50. Tiffin

February 16, 2020 by Sophie Faulkner in Recipe

As my rugby match today was cancelled AGAIN today, thanks to Storms Ciara and Dennis, I asked my Instagram followers what they’d like me to bake. An old friend suggested ‘best ever fridge cake’, which could only mean making some good old tiffin. Thanks Louisa (@loukdavis) for the suggestion! Mum used to make tiffin when I was younger and honestly it is the best fridge cake in my opinion, and very easy to do. Extremely doable for kids!

If you want a step by step with pictures/videos, I instagrammed the full recipe process and have it as a highlight on my Insta page. Have a look and a follow if you don’t already!

Makes 9 squares

Ingredients

  • 100g butter, cubed

  • 250g chocolate

  • 3 tbsp sugar

  • 3 tbsp golden syrup

  • 200g digestives

  • Handful of raisins, or sultanas

Method

  1. Line a small baking tin with clingfilm. This will make getting your tiffin out REALLY easy.

  2. Melt your butter, 50g of the chocolate, the sugar and golden syrup in a pan or bain marie (bowl over a pan of simmering water).

  3. Bash up your digestives until you have some bite size pieces of biscuit and lots of crumbs.

  4. Add the biscuits and raisins/sultanas to the melted chocolate/butter and mix until well combined.

  5. Press the biscuit mixture into your lined tin as flat as possible.

  6. Melt the remaining 200g of chocolate in the microwave or on a bain marie, then pour and spread over the biscuit layer.

  7. Put in the fridge to set for at least 2 hours.

  8. Take out of the tin and cut with a large sharp knife into squares and enjoy!

View fullsize IMG_5249.JPG
View fullsize IMG_5251.JPG
View fullsize IMG_5254.JPG
View fullsize IMG_5257.JPG
February 16, 2020 /Sophie Faulkner
Recipe, sweet, Chocolate, Biscuit, tiffin, raisins
Recipe
Comment
IMG_5226.JPG

49. Valentine's Rose Cupcakes

February 11, 2020 by Sophie Faulkner in Recipe

Not into cookies? No worries, I’ve got the Valentine’s cupcake angle sorted too! Flowers and chocolates are always nice, but why not just combine the two and make these chocolate cupcakes with vanilla buttercream roses?

Makes 12 rose cupcakes

Ingredients

For the cupcakes

  • 170g (6 oz) butter, room temp

  • 140g (5 oz) caster sugar

  • 3 eggs

  • 140g (5 oz) dark chocolate, melted

  • 1 tsp vanilla extract

  • 170g (6 oz) self-raising flour

  • Pinch of salt

For the buttercream

  • 300g (10.5 oz) butter, room temp

  • 450g (15.75 oz) icing sugar

  • 1 tbsp vanilla extract

  • 1-2 tbsp milk

  • a few drops red food colouring

Method

  1. Preheat oven to 160C and line a cupcake tray

  2. Cream together the butter and caster sugar for the cupcakes until light and fluffy.

  3. Add in the eggs, melted chocolate and vanilla extract, with a tablespoon of the flour to help it not split.

  4. Mix in the flour and salt, until well combined.

  5. Place a heaped tablespoon of mixture in each cupcake case.

  6. Bake for 25-30 minutes until a skewer comes out clean. Allow to cool to room temperature before icing

  7. Cream the butter for the icing until light and fluffy. Add in the icing sugar in three portions, beating between each, until light and fluffy, then add in the vanilla extract and milk (as much as needed). Keep beating if not light and easily spreadable.

  8. Split half the buttercream into a separate bowl. Colour half with red food colouring until pink. Add a few drops at a time and beat until you get your desired colour.

  9. Prepare a piping bag with a star shaped nozzle. Fill with the pink icing first, and then create a hole down the centre and fill with the remaining white icing.

  10. Pipe from the centre of the cupcake outwards, until you have created a rose. DO NOT twist the cupcake as you pipe, as this will lose the rose effect. Your first couple of roses may be purely pink, depending on how successful the piping filling has gone, but you should get some nice two tone roses in the bouquet!

  11. Give to a loved one, or just to yourself. You deserve flowers.

View fullsize IMG_5212.JPG
View fullsize IMG_5220.JPG
View fullsize IMG_5217.JPG
View fullsize IMG_5219.JPG
IMG_5228.JPG
February 11, 2020 /Sophie Faulkner
valentine, Rose, cupcake, Chocolate, Vanilla, buttercream, sweet, Recipe
Recipe
Comment

48. Mocha Shortbread Hearts

February 08, 2020 by Sophie Faulkner in Recipe

Valentine’s Day is coming up, so I thought I’d post some themed recipes. It’s almost like I thought ahead and planned! They say that the way to a man’s heart is through his stomach, so I thought I’d test that theory with these mocha shortbread hearts as he’s a big shortbread fan. I know my boyfriend loves me anyway, but I don’t think they hurt!

These are REALLY easy to make, so if you’re stuck for something to do for your valentine, why not give these a go this week? Or look out for my cupcake recipe going up early next week in time for V day.

Makes 15-20 cookies (depending on cookie cutter size)

Ingredients

  • 180g butter, room temperature

  • 70g light brown sugar

  • 1 tsp instant coffee granules

  • 180g flour

  • 30g cocoa powder

  • 100g chocolate chips

Method

  1. Mix the butter and sugar together until smooth and combined.

  2. Mix the coffee granules together with a tbsp hot water until dissolved.

  3. Mix the flour, cocoa powder and coffee into the butter and sugar, using your hands to bring it all together into one cohesive dough.

  4. Wrap your dough in clingfilm and chill in the fridge for at least 20 minutes

  5. Preheat the oven to 180C and line a baking tray.

  6. Roll out your dough on a lightly floured surface until about 1cm thick and start cutting out hearts (or whatever shape cookie cutters you have). Transfer the cut outs to the baking tray.

  7. Squeeze the leftover scraps into one ball and reroll out and cut again. Repeat until all the dough is used.

  8. Bake for 10-12 minutes until the cookies are just firm and allow to cool.

View fullsize IMG_5150.JPG
View fullsize IMG_5152.JPG
View fullsize IMG_5157.JPG
View fullsize IMG_5166.JPG
February 08, 2020 /Sophie Faulkner
Shortbread, Recipe, valentine, coffee, Chocolate, mocha, sweet
Recipe
Comment
IMG_5073.JPG

47. 'Chorizo' Bakes

February 01, 2020 by Sophie Faulkner in Recipe

Well it’s been a little while since I’ve done a savoury recipe on here. So much of baking is all about sugar and spice and everything sweet tooth related aka nice, but you can’t live on that. Or you can’t live on just that. Or you can’t live on just that every day. At least…. once a week?… you should probably eat something savoury.

For those of you who feel the need to eat something savoury, have a go at these “chorizo” bakes. No chorizo involved, or meat if you use vegetarian sausages, but all the flavours of chorizo are there to be enjoyed! This recipe was inspired by one from the BBC Good Food magazine, but I found their ratios of filling to pastry to be a bit wrong, so this is my updated version.

This recipe is really easy to adapt to be vegetarian or vegan depending on the sausages and milk you use. Most puff pastry sheets you buy at supermarkets are already suitable for vegans, just make sure to check the packaging!

I made two batches of these, and Callum couldn’t get enough. Maybe I should make him more savoury stuff. More than once a week. Maybe. The leftover filling from doubling up the batch size made a great pasta sauce when combined with chopped tomatoes!

Makes 6 bakes

Ingredients

  • 3 sausages, vegetarian or pork

  • 1/2 onion, finely diced

  • 2 garlic cloves, crushed

  • 1 tsp olive oil

  • 1 bell pepper, finely sliced

  • 2 rosemary sprigs, chopped

  • 2 tsp harissa paste

  • 2 tsp ground cumin

  • 2 tsp paprika

  • 1 tsp cayenne pepper, or chilli powder

  • 1 sheet rolled puff pastry

  • 1 tbsp milk, or milk alternative

  • 1 tbsp sesame seeds

Method

  1. Chop up your sausages into small bits. Combine with the onion, garlic, oil, harissa and spices and fry in a pan for about 8 minutes, until the sausage is cooked and the onion has softened. Allow to cool.

  2. Preheat the oven to 200C and take out your puff pastry sheet.

  3. Cut your puff pastry (either on a lightly floured surface or on greaseproof, it usually comes rolled in it) into 6 squares/rectangles.

  4. Place a heaped spoon of your filling into the centre of one half of your square/rectangle and brush around the edges of the visible pastry with your milk. Fold the pastry over your filling and use a fork to crimp it together along the edges. Transfer to a lined baking tray. Repeat for all 6.

  5. Brush the tops of your bakes with more milk and sprinkle on some sesame seeds.

  6. Bake for 25-30 minutes until the pastry is golden.

  7. Enjoy hot or cold!

View fullsize IMG_5046.JPG
View fullsize IMG_5047.JPG
View fullsize IMG_5059.JPG
View fullsize IMG_5061.JPG
February 01, 2020 /Sophie Faulkner
Recipe, Savoury, bake, pastry, puff pastry, sausage, chorizo, vegetarian, vegan
Recipe
Comment
IMG_5064.JPG

46. Doughnuts

January 25, 2020 by Sophie Faulkner in Recipe

Who knew you could make doughnuts at home?? WITH OR WITHOUT A DEEP FAT FRYER!

This week I made doughnuts for the very first time and they were delicious. I would HIGHLY recommend giving them a go yourself. They are delicious as they are, rolled in a bit of sugar, or extremely messily filled with jam (shout out to Eszter (Instagram: @eszterpinter98) for the lovely jar of jam she sent me).

I was inspired by the recipe book ‘Made in London’ by Leah Hyslop. I read this cookbook cover to cover, as it wasn’t just DELICIOUS recipes, but also has so much about the history of food in London and how it shaped London. It was genuinely a really good read, full of great recipes to try yourself, so I would highly recommend it as a gift for the London foodie in your life.

Have to say they are best eaten quickly, as stale doughnuts are OK, but no one would choose one. So eat them while they’re hot!!

Makes about 35 - 40 small doughnuts

Ingredients

  • 100g butter

  • 170ml milk

  • 500g plain white flour

  • 7g sachet of fast action dried yeast

  • 50g caster sugar, plus more for rolling the doughnuts in

  • 1 tsp salt

  • 2 eggs + 2 egg yolks

  • zest of 1 lemon

  • sunflower oil for frying and greasing (I used 1.5 litres, it will depend on the size of your pan/fryer)

Method

  1. Gently melt the butter in a saucepan with the milk until all melted and the mixture is warm, NOT boiling.

  2. Mix together the flour, yeast, sugar and salt, then add in the butter and milk, eggs, yolks and lemon zest. Stir until it forms one dough.

  3. Knead the dough for 10-12 minutes by hand, or for 8-10 minutes on a low speed in a stand mixer with dough hook attachment. You want to achieve a glossy and smooth dough.

  4. Place the dough in a lightly oiled bowl, cover with clingfilm or a damp tea towel, and leave for an hour until doubled in size.

  5. Grease two baking trays with oil.

  6. Roll the dough out on a lightly floured surface, to about 1cm thickness. Cut out rounds using a 5cm straight edged cookie cutter and transfer the rounds to the baking trays. Gather the scraps and roll out again until the majority of your dough is used.

  7. Cover the baking trays and leave your rounds to rise for about 45 minutes, so they have puffed up a bit.

  8. Fill a deep pan with oil and heat to 165C. A cube of bread will sizzle and turn golden in about 60 seconds if you don’t have a thermometer to hand.

  9. Cook your doughnuts in batches, not overcrowding the pan, for about 2/2.5 minutes on each side. Drain for a minute or two on kitchen paper and then roll in a shallow dish of sugar.

  10. Enjoy while hot!

IMG_5037.JPG
IMG_5039.JPG
IMG_5042.JPG
IMG_5049.JPG
IMG_5052.JPG
IMG_5053.JPG
IMG_5063.JPG
IMG_5066.JPG
IMG_5070.JPG
January 25, 2020 /Sophie Faulkner
doughnut, sweet, Recipe
Recipe
Comment

45. Espresso Chocolate Cake

January 16, 2020 by Sophie Faulkner in Recipe

I have the week off work!!! It has honestly been so nice to just chill out this week, as Christmas felt really hectic and not like a rest. To make full use of this I went to visit my Dad for a couple of days, and while there, decided that, you know, baking was required. And as Dad and my step-mum love coffee, an espresso cake that was definitely not too sweet was the right way to go.

This cake is really easy and the perfect afternoon snack for coffee time. I hope you enjoy!

Makes 1 cake

Ingredients

For the cake

  • 170g (6 oz) butter

  • 85g (3 oz) demerara

  • 85g (3 oz) light brown sugar

  • 170g (6 oz) self raising flour

  • 2 eggs

  • 75g (2.5 oz) dark chocolate, melted

  • 1 espresso (1 oz = ~30ml)

For the buttercream

  • 200g (7 oz) butter, room temp

  • 300g (10.5 oz) icing sugar

  • 50g (1.75 oz) dark chocolate, melted (+ some for grating to sprinkle)

  • 1 espresso (1 oz = ~30ml)

  • a pinch of salt

Method

  1. Preheat the oven to 170C and line a square cake tin with greaseproof paper.

  2. Cream together the butter and all the sugars until light and fluffy.

  3. Add in the eggs one at a time and combine, adding in the flour if the mixture starts to curdle.

  4. Add in the flour, and then the melted chocolate, and espresso. Mix until well combined.

  5. Scrape all the cake mix into the cake tin, and spread evenly into all the corners.

  6. Bake for 30-35 minutes until a skewer comes out clean and it bounces back.

  7. Leave to cool in the tin for at least 10 minutes and then allow to cool on a cooling rack to room temperature.

  8. For the icing, beat the butter until light and fluffy on its own, and then add the icing sugar in a bit at a time until fully combined. Add in a pinch of salt and mix.

  9. Split the buttercream base into two and move half of it into another bowl. Add the melted chocolate to the first half and beat until well combined. Add the half of the espresso to the second half and beat until well combined. Taste to see how strong the coffee flavour is and add more espresso as needed.

  10. Fill two piping bags with your two buttercreams and decorate the cake in your desired pattern (I chose diagonal lines). If you choose to sprinkle the shaved chocolate on, I chose to sprinkle it only on the chocolate buttercream to maintain the contrast between the two icings.

  11. Enjoy!

IMG_4988.JPG
IMG_4993.JPG
IMG_4996.JPG
IMG_5008.JPG
January 16, 2020 /Sophie Faulkner
Recipe, coffee, cake, espresso, buttercream, sweet
Recipe
Comment
IMG_4972.JPG

44. Coconut Choc Chip Cake with Best Chocolate Buttercream

January 11, 2020 by Sophie Faulkner in Recipe

It was a colleague’s birthday at work this week, so I offered to make him a birthday cake. When asked what he would like, he ummed and ahhed, until I elicited the words chocolate and coconut fro him. That was as good a place to start as any.

But then he said white chocolate.

I don’t really like white chocolate in large quantities, as its REALLY sweet, and its not all that easy to bake with. So I made a white chocolate and coconut cake. This is not the cake pictured here. I was so embarrassed by not only the fact that the cake was ridiculously sweet (my boyfriend said he just pretended he was eating a white chocolate bar), but it was also hideous. I really messed up my ratios on the white chocolate ganache, and had been impatient when turning the cakes out and frosting so it was all crumbling and not smooth. It was not good.

So I made another cake. This one. Learning from my previous errors to make a cake that went down EXTREMELY well at work. Why not give it, or similar, a go this weekend?

Makes 1 cake and buttercream for 1 cake/12 cupcakes

Ingredients

For the cake

  • 170g (6 oz) butter

  • 130g (4.5 oz) caster sugar

  • 85g (3 oz) desiccated coconut (+ some for sprinkling)

  • 140g (5 oz) self raising flour

  • 3 eggs

  • 100g (3.5 oz) chocolate chips (I used white choc chips)

For the buttercream

  • 100g (3.5 oz) dark chocolate, melted (+ some for grating to sprinkle)

  • 200g (7 oz) butter, room temp

  • 300g (10.5 oz) icing sugar

  • 2 tbsp milk

  • a pinch of salt.

Method

  1. Preheat the oven to 160C. Line two sandwich tins with greaseproof paper and grease the sides.

  2. Cream together the butter and sugar until well combined.

  3. Add in the eggs, desiccated coconut and self raising flour, and beat until smooth.

  4. Mix in the chocolate chips until distributed throughout the cake mix, then divide into your sandwich tins. (roughly 13oz in each tine if you want to be precise)

  5. Bake for 20-25 minutes until slightly golden, and a knife comes out clean.

  6. Allow the cakes to cool in their tins until the tins are cool enough to hold. Tip out your cakes and allow to cool further on a cooling rack. Place in the fridge to cool down further if you intend to spread rather than pipe your icing as this will make it less likely to crumble.

  7. Beat the butter for your buttercream until light and fluffy.

  8. Add in your icing sugar in two gos (or else it tends to go everywhere), and beat until light and smooth.

  9. Beat in your melted chocolate and a pinch of salt.

  10. Fill a piping bag and pipe a border around the edge of your bottom cake, then fill the middle with icing and spread to your border. This will keep it neat.

  11. Place your top cake on top and decorate (piping or spreading) however you like! Sprinkle on a little grated chocolate and desiccated coconut and enjoy!

View fullsize IMG_4961.JPG
View fullsize IMG_4963.JPG
View fullsize IMG_4967.JPG
View fullsize IMG_4969.JPG
IMG_4977.JPG
January 11, 2020 /Sophie Faulkner
cake, Chocolate, coconut, buttercream, icing, sweet, Recipe
Recipe
Comment

43. Use-it-up berry jam! (tarts optional)

January 02, 2020 by Sophie Faulkner in Recipe

2020, let’s go! One of my new year’s resolutions is to actually maintain this blog. One post a week, without fail. Let’s see how long that lasts…]

As its a New Year, Callum and I decided it was time to have a tidy out, to start the new year fresh. This meant not only the cupboards, but the fridge and freezer. In the dark recesses of the freezer drawer there was a bag of frozen summer fruits, looking forlorn and forgotten that needed using or getting rid really. So I used them to make these mini jam tarts, using the left over pastry from our New Year’s Eve chocolate tart, made using this recipe. I didn’t have much pastry, so I only made 8 mini tarts, and have a big 500ml jar full of jam to be used with toast, or cake, or biscuits, or eaten within a spoon… so many options!

If you don’t fancy a mix, give my fresh strawberry jam tarts recipe a go!

This recipe makes roughly 550ml of jam.

Ingredients

For the jam

  • 500g (17.5oz) frozen mixed summer berries, defrosted in the microwave

  • 500g (17.5oz) caster sugar

  • 1 tbsp lemon juice

For the pastry (optional)

  • 200g (7oz) plain flour

  • 125g (4.5oz) butter

  • 50g (1.75oz) caster sugar

  • 1 medium egg

  • a pinch of salt

    OR about 400g ready made shortcrust pastry

Method

  1. (TARTS) If making your own pastry, start by creaming together the pastry sugar and butter, before adding in the egg a bit at a time so that it doesn’t split. Then add in the flour and the salt and mix until it all comes together and there are no lumps of butter. Wrap in clingfilm and put in the fridge to rest for 20-30 minutes.

  2. Sterilise your jam jar(s).

  3. Place a plate in the freezer. This is to do your jam test later. Important step. Don’t miss it.

  4. Place your defrosted berries in a saucepan over a medium heat with the lemon juice and stir in the sugar until it has all dissolved. Your berries should be soft from being defrosted.

  5. Boil steadily for about 8-9 minutes. Remove from the heat and spoon a little onto your chilled plate and leave for a minute. Run a finger through your jam and if it crinkles and doesn’t flood back into the gap you have just created, it’s ready. As the berries have been frozen, they will likely contain more water than fresh berries and so will take longer to reduce into jam.

  6. If your jam fails the plate test, put it back on the heat and boil for another minute then try again. If it passes, skim off any froth and leave to the side to cool for 10-15 minutes, before filling your jam jar(s).

  7. (TARTS) Grease a muffin tin. Preheat the oven to 180C.

  8. (TARTS) Take your dough out of the fridge and on a floured surface roll it to about 8mm thick. If your dough is too cold and stiff, let it warm up a little at room temperature until it’s easier to roll. Don’t leave it too long or it’ll go soft.

  9. (TARTS) Cut your dough using a large circular cookie cutter. Place your twelve dough circles into your muffin tin and press down gently with your fingers, making sure it sinks to the bottom and fills in the bottom corners. You want the sides to come about halfway up the muffin tin.

  10. (TARTS) Spoon the cooled jam into each case not quite to the brim.

  11. (TARTS) Bake for 12-15 minutes until the pastry has turned a light golden brown.

  12. Leave to cool.

  13. Enjoy!

View fullsize IMG_4906.JPG
View fullsize IMG_4912.JPG
View fullsize IMG_4913.JPG
View fullsize IMG_4915.JPG
View fullsize IMG_4916.JPG
View fullsize IMG_4918.JPG
View fullsize IMG_4924.JPG
View fullsize IMG_4927.JPG
January 02, 2020 /Sophie Faulkner
Recipe, jam, berry, Tart, sweet
Recipe
Comment
IMG_4337.jpg

42. Banana Cupcakes

September 28, 2019 by Sophie Faulkner in Recipe

Some people really don’t like banana. I don’t understand those people.

Banana bread/cake/muffins are some of my favourites. The flavour of banana is just so unique, you don’t really get anything else like it, at least not normally. I mean, apples taste kinda like pears, oranges and lemons can give pretty similar citrus flavours, but bananas? In a class of their own.

Here’s an extremely easy recipe for if you have a banana left over that’s gone just s bit too ripe for you to want to eat straight out of the fruit bowl.

Makes 12 cupcakes

Ingredients:

  • 1 overripe banana, mashed

  • 100g (3.5oz) butter, room temperature

  • 30g (1oz) golden syrup

  • 140g (5oz) light brown sugar

  • 170g (6oz) self-raising flour

  • 2 eggs

  • pinch of salt

  • 1 tsp ground cinnamon

  • 1 tsp ground ginger

Method

  1. Preheat the oven to 180C and line a muffin tray

  2. Cream the butter and sugar until light and fluffy

  3. Add in the mashed banana and golden syrup and mix until combined

  4. Sift in the flour, salt, cinnamon and ginger and combine.

  5. Add in the eggs and mix until batter has fully combined together.

  6. Split your mixture evenly between 12 cases

  7. Bake for 20-25 minutes until golden and risen.

  8. Enjoy!

IMG_4323.JPG
IMG_4325.JPG
IMG_4329.JPG
IMG_4341.JPG
September 28, 2019 /Sophie Faulkner
Recipe, sweet, banana, cupcake
Recipe
Comment

Review 6: Peyton and Byrne

September 22, 2019 by Sophie Faulkner in Review
IMG_4147.JPG

The other week both me and my friend had both had a pretty miserable time. So we decided that meeting up for an afternoon wandering around Greenwich would be the ideal cure for our foul moods, and you know? It worked.

There was absolutely no question that we would be stopping at a cafe while in Greenwich, we both love cake way too much to go out for an afternoon and not find a local cafe. So we spent the overground ride googling potential candidates for our afternoon cake fix and came across Peyton and Byrne. The reviews were good, it was near the overground, we had a winner.

After a wander around Greenwich Park, taking in the views from the top of the hill looking over the Thames and strolling through the flower gardens, it started to rain. There was never a surer sign that it was time for cake.

Catherine had a slice of Bakewell, while I opted for the Chocolate and Salted Caramel Tart. I can’t speak for the Bakewell, but my goodness my tart hit the spot. Gorgeous shortcrust pastry, with a layer of salted caramel on its base, then filled with a rich creamy chocolate ganache, topped with chocolate shavings. It was drool worthy. I will 100% be attempting to recreate this at home in the not too distant future.

Turns out, Peyton and Byrne have three cafes/bakeries across London, with locations in Fitzrovia and Covent Garden, as well as this one in Greenwich. I’d highly recommend a visit if you are passing by. You can find Peyton and Byrne’s details below.

Review:

Item: Chocolate & Salted Caramel Tart, £3.80 (take out)/£4.50 (eat in)
10/10 for taste, 6/10 for cost ( London prices hey?)

Peyton & Byrne Greenwich Details:

Hours: Mon–Fri: 7.30am–7pm, Weekends: 8am–7pm

Address: 20-22 Greenwich Church Street, London, SE10 9BJ

Website: https://www.peytonandbyrnebakeries.com/#bakeries

Here one minute

Here one minute

Gone the next

Gone the next

September 22, 2019 /Sophie Faulkner
review
Review
Comment
IMG_4228.JPG

41. Ginger Cookies

September 15, 2019 by Sophie Faulkner

Sometimes you just get a craving, and this week I just had a craving for ginger biscuits. I could not get them off my mind, so I just had to make them. Work has been trying and I had exams on Monday and Tuesday, so it’s all just been a bit stressful recently, but being able to escape into baking makes it just that little bit better.

Makes 24 cookies

Ingredients

  • 225g (8oz) plain flour

  • 3 tsp baking powder

  • 2 tsp cinnamon

  • 4 tsp ground ginger

  • pinch of salt

  • pinch of ground black pepper

  • 120g (4oz) butter (cold and diced)

  • 120g (4oz) sugar

  • 120g (4oz) golden syrup

Method

  1. Preheat oven to 180C and line two baking trays.

  2. Combine the flour, baking powder, cinnamon, ginger, salt and pepper in a large mixing bowl.

  3. Rub in the butter until there are no yellow lumps and your mixture is the consistency of bread crumbs.

  4. Mix in the sugar.

  5. Mix in the golden syrup and mix until fully incorporated.

  6. Using your hands, bring the dough together into one large ball and split into quarters.

  7. Split each quarter into six pieces and roll into rough balls and place on the baking trays with plenty of space in between.

  8. Bake the cookies for 9-11 minutes until your cookies are golden and they have a few cracks visible on top, they will still be soft.

  9. Leave to cool on the baking trays for 5 minutes and then transfer to a wire rack to continue cooling.

  10. Enjoy!

IMG_4208.JPG
IMG_4211.JPG
IMG_4216.JPG
IMG_4221.JPG
IMG_4223.JPG
IMG_4227.JPG
September 15, 2019 /Sophie Faulkner
  • Newer
  • Older

Powered by Squarespace